Making Hay While the Sun Shines
July 6, 2015/
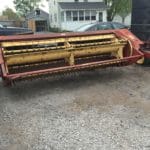
Mowing hay with a diskbine.
So you want to make hay, eh? In this fourth installment on farm machinery, I present information for the new, small, or beginning farmer about the equipment, steps, and skills needed to make dry hay. There are many good reasons as to why you should not try to make hay for your farm.
First, the equipment can be expensive to purchase; several machines are needed to make dry hay from beginning to end. Secondly, machinery can be quite expensive to repair and especially if you don’t have farm equipment “tinkering” skills. Third, the entire process can be quite time consuming, typically requiring three consecutive days of dry and sunny weather to complete one batch of hay. Such weather can be in short supply in the month of June when most first cut hay needs to be made.
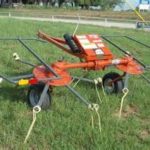
A tedder used for fluffing hay to speed up drying time.
This is the main reason that commercial farmers have gone to making hay silage or baleage which can be made in a 24 hour period. However, high moisture hay requires even more expensive machinery to accomplish, such as large forage harvesters, forage wagons, large round or square balers, wrapping equipment, and specially equipped front end loader tractors to handle all the added weight.
Fourth, you may work off the farm and can’t be at home to make hay in a timely fashion. In true Murphy’s Law fashion, the weather seems to be beautiful only when you are at work off the farm and rainy when you do manage to squeeze some time at home. Fifth, haymaking can be quite labor intensive and finding enough help to load and unload hay can be all but impossible. Nothing is more discouraging than to have all your loaded hay wagons waiting to be unloaded, rain clouds are rolling in, and the help that promised to show up not only doesn’t do so, but doesn’t even bother to call and let you know. The thunder clouds and rain move in, and your remaining dry windrows of hay get soaking wet, and ruined.
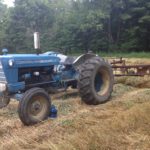
An older side delivery rake used for raking hay into windrows.
If this hasn’t managed to dissuade you from making dry hay, there are several compelling reasons to making hay on your own. First, you can learn how to do the entire hay making process and make top quality hay and save considerable amounts of money as compared to purchasing feed. Good quality forages are creeping up in value each year; hay that used to sell for $1.00 for a small square bale now easily brings $3-4 a bale, equating to upwards of $200 a ton. Second, you can manage your own cropland correctly from an agronomic point of view and not be at the mercy of depending on someone else to come and harvest it for you, ensuring top quality for your animals. Many arrangements have been used between farmers without hay making equipment and hiring someone to do it for you, but whoever has the machinery is literally in the driver’s seat. Third, by making your own you may end up with some extra hay that can be stockpiled in your barn for resale to others, or to have on hand as “insurance” during droughts or excessively wet weather.
Making dry hay has several steps and machines needed to complete the process. They are in order of process: mowing, tedding, raking, baling, and loading, hauling, and unloading.
- Mowing, or harvesting the hay. Several types of machines can be used for this process, such as sickle bar mowers, mower-conditioners, disk mowers, and disk mower –conditioners. I would not recommend using sickle bar mowers, as most of these machines that are still in circulation are obsolete and difficult to mow thick swards of hay with. A mower conditioner might be the best choice for a small farmer, which is a sickle bar mower combined with a set of rolls which crushes and squeezes the moisture out of the hay; commonly referred to as a “haybine”. They also typically need only one set of hydraulic outlets that might be more common on smaller tractors. Haybines are still manufactured, and many good used ones are still in circulation although mostly having been replaced on commercial farms by disk-mowers, or “diskbines”. Haybines tend to require lower power tractors; a 40-50 horsepower tractor is sufficient to operate they typical nine foot one, whereas at least a 75 horse power tractor is required to operate a diskbine. Disk mowers normally need two sets of hydraulic outlets, and as mentioned, a somewhat bigger tractor to power. Disk mowers are also available which do not have rolls present to crush they hay, and can be used by smaller horsepower tractors.
- Tedding is the second step in the haymaking process. A power take off driven tedder gently “kicks up” hay into the air so that it dries much quicker, and is typically done later in the day that the hay was mowed, or the next day. Later on in the season when the grass tends to be drier sometimes tedding can be dispensed with, but in late May and June it is all but impossible to get hay to dry in a timely fashion without tedding. Typically tedders come in two row versions but one row versions can be found at about half the cost. They tend to be fairly light in their power requirements and a relatively small tractor can pull one. Tedding hay is also indispensable in getting hay to dry out again if it gets rained on.
- Raking is normally the third step in the dry hay making process. Most small farmers end up using the type of rake that is known as a “side delivery rake”. Raking is necessary to get the hay up off the ground, and into windrows to dry, where it can be baled.
- Baling and all of the myriad ways to collect hay is probably the most labor intensive part of the haymaking process. The two most common methods nowadays to bale hay available to the small farmer are small square bales and round bales. Small square bales can be dropped directly on the ground, but this is a very labor intensive method as the bales have to be picked up manually. A flatbed wagon is another alternative, which follows the baler with someone on the wagon to grab the bales as they come out of the baler. The most common square balers today come with bale ejectors to throw the bales into a wagon with sides. This is the most efficient way to deal with small square bales.
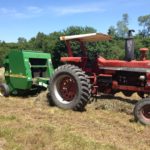
A labor saving round baler that requires two hydraulic outlets on a tractor.
In recent years, round balers have become quite popular, as much more hay can be put into a round bale, upwards of 1,000 pounds, depending on the size of the baler. This is by far the most labor efficient way to put up bales, as the labor needed to handle small square bales is eliminated. Round bales also do not need to be immediately picked up out of the field like small squares, but certainly the sooner the better. Round bales can be handled with simple spears that go on front end loaders or three point hitch attachments. They are also a much better choice for people with allergies, as the hay is not handled anywhere near as much as small square bales are. I grew up making small square bales and was miserable every summer, between runny eyes, a dripping nose, and wheezing lungs. In addition to the health benefits, round baling has allowed me to make hay with no other labor.
So there it is; mowing, tedding, raking, baling, and getting the hay home. Nothing is more pleasant than sitting on a small tractor and slowly raking or tedding hay, smelling the delightful smells of freshly mown hay, and enjoying some of the sights of nature while doing so.
Rich Taber lives on a farm in Madison County where he makes hay for his beef and sheep operation. He can be reached at CCE Chenango at 607-334-5841, ext. 21, or email: rbt44@cornell.edu.
Posted in Small Farms Quarterly

Outstanding article!! As I transition from the battlefield to the farm fields, I really desire to be as self-sufficient as possible and as the article points out, hay is expensive nowadays. I have been doing a great amount of research to understanding hay and hay bailing, and this article it all of the points with great persuasion! This really points me in the direction to pay for hay or to really commit into hay making. thank you so much.
Carli. Thank you for the “haymaking” article. I’m looking to purchase 60 acres (40 acres) in fields. I need to keep the Ag exemption, but can t find a local farmer to commit to “haying” the fields. Any suggestions ?thanks
Hello Mark, you can contact Carli directly with your questions at rbt44@cornell.edu.