2. Seven Stages of Cultivation
Regardless of the location, species, and method, there are seven main steps to the process of growing mushrooms. Keep in mind that while the steps below are generally true for all methods and species, there is quite a bit of detail depending on the species of mushrooms and growing medium you choose. Here we overview the key points to each step in the process. From this, you can see which strategies emerge for your enterprise that align with your mission and goals.
Stages of Cultivation
1. Strain Selection
2. Substrate Preparation
3. Inoculation
4. Incubation
5. Initiation
6. Fruiting
7. Harvest
1. Strain Selection
Strain selection is one of the commonly overlooked but extremely important factors to successfully growing mushrooms. The strain is similar to a plant breed. Individual species of mushrooms like Pleurotus ostreatus (commonly known as oyster mushrooms) will have thousands of different strains or expressions of the genetic make- up. This is really easy to illustrate using humans. All humans are in the species Homo sapien but each individual human or “strain” of Homo sapien has a particular set of genetic information that influences all sorts of factors. Factors like size, strength, color, health, longevity, maybe even personality are influenced by the particular strain.
With mushrooms very important factors are influenced by the strain, including:
• How fast the mycelium grows
• Color of the fruiting body
• Shelf life of the fruiting body
• Fruiting temperature
• Size and quantity of fruiting bodies (yield)
The simple act of selecting the right strain can easily triple yields! Fungi Ally has studied this with cordyceps and shiitake mushrooms, both species showing large variables in the correlation between strain and yield.

In the cordyceps strain trials, yields varied from 3.5 grams per jar to 11.8 grams per jar. The shiitake trials were done on two different substrates: logs and supplemented sawdust blocks. Both had large variables in yield depending on the strain selected. For logs, average yield varied from .5 - 2.3 pounds per log, with strain LE-46 performing the best. On sawdust, yields varied from .3 - 1.4 pounds per block, with strain 3782 performing the best and strain 46 doing the worst. This illustrates how some strains are developed to consume certain substrates. This data also shows that proper strain selection can be the difference between a profitable farm and going out of business.


In the cordyceps strain trials, yields varied from 3.5 grams per jar to 11.8 grams per jar. The shiitake trials were done on two different substrates: logs and supplemented sawdust blocks. Both had large variables in yield depending on the strain selected. For logs, average yield varied from .5 - 2.3 pounds per log, with strain LE-46 performing the best. On sawdust, yields varied from .3 - 1.4 pounds per block, with strain 3782 performing the best and strain 46 doing the worst. This illustrates how some strains are developed to consume certain substrates. This data also shows that proper strain selection can be the difference between a profitable farm and going out of business.
Any spawn or ready-to-fruit block provider will provide high quality strains selected for maximum performance. If you are producing spawn in-house, its best to trial 4-5 strains side by side to see which one does best. Every couple of months it is good to experiment with a new strain to see if improvements can be made. Growers are constantly trading strains to look for the best combination of strain and substrate. Once the strain is selected, spawn can be ordered or produced.
“Spawn” is intentionally cultivated mycelium from a known species that has been isolated, generally in a sterile lab facility, to ensure it is free of outside contaminants. For most growers, spawn is purchased from a supplier, much like a vegetable grower buying seed from a company. Spawn comes in three common forms: grain, sawdust, and plug.
2. Substrate Preparation
All organic material is broken down by fungi and bacteria. The job of a cultivator is to get the mycelium of the desired edible mushroom established before anything else can take hold. For the highest chance of success, the material or “substrate” needs to be prepared. The word substrate refers to any material that is a food source for mushroom mycelium. The way the substrate is prepared will be guided by the type of substrate and the equipment that is available. Preparation includes ensuring moisture content is optimal and the substrate is clean of contaminants, mixing substrates if desired, and sometimes placing the substrate into a bag. Common substrates include logs, stumps, woodchips, straw, sawdust, coffee grounds, grain hulls, and other carbon-rich materials. Some species are very particular about the type of substrate used, while others are flexible.

There are several options for substrate preparation depending on the grower’s goals, available resources, and infrastructure on the farm or growing site. Each technique carries a set of pros and cons. In general, lower tech methods focus on using low nitrogen, high carbon materials like oyster mushrooms on straw or shiitake on logs. The higher tech methods generally use higher nutrient materials to increase speed of colonization and yield. High tech methods utilize sterilization methods and employ a mix of sawdust or hardwood fuel pellets plus a high nitrogen supplement (grain or seed hulls, coffee grounds etc).
BELOW IS A REVIEW OF SOME COMMON SUBSTRATES AND HOW TO PREPARE THEM:
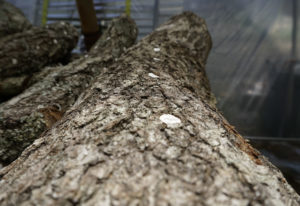
Logs, wood chips and stumps:
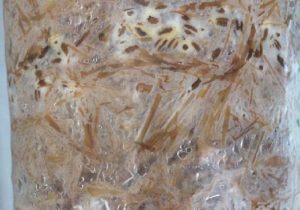
Straw:
Coffee Grounds: Coffee grounds are an interesting substrate to use
because they are effectively sterilized when they are used to produce coffee. Two important steps for successfully growing on coffee grounds are: 1) to inoculate the same day as brewing the coffee with them (or resteralize), and 2) to add sawdust to the spent coffee grounds. The nutrients in spent coffee grounds are much more readily available than in wood so ambient bacteria and fungi will start growing within two or three days. Because of this, the grounds should either be inoculated the same day they are used to make coffee or frozen until they can be inoculated. When inoculation does happen, grounds should be mixed with 50% sawdust to increase aeration. The sawdust, which has low nutritional value does not need to be treated.
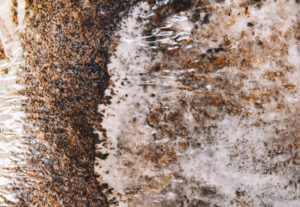
Supplemented sawdust/wood pellets:
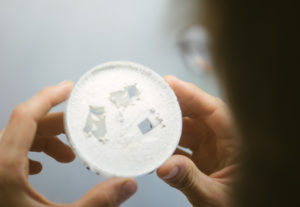
Agar:
Grain:
Grain is used as a high nutrient medium for rapid mycelial expansion. It is typically the step after mycelial growth on agar medium. Grain is too expensive and too high in nutrients for bulk substrate fruiting, but can be a good supplement to the sawdust or wood pellet base. It works well to boost yields by inoculating straw with large amounts of grain spawn. Grain also needs to be treated using pressurized steam and inoculated in lab conditions. It is very easy to get contamination on grain, so this is not a beginner substrate.
The different substrates are “cleaned” or prepared by several different methods. The table below illustrates common treatment methods and for which substrates they are used.
| Method | Substrate | Materials Needed |
| Fresh | Logs, woodchips, straw at cold temperatures, hot compost | Source for substrate |
| Cold Ferment | Straw | Bucket, water, cinder block |
| Hot pasteurization | Straw, compost, wood pellets, coffee grounds | Heat source, metal container, cinder block |
| Lime | Straw, wood pellets | Lime, water, barrel |
| Atmospheric steam | Supplemented sawdust, straw | Steam source and metal vessel |
| Pressurized steam | Agar, grain, supplemented sawdust | Pressure canner pot, Autoclave |
Each of the treatment methods below has its own set of positive and negative attributes. Growers may want to consider trialing several methods to see what works best for them.
| Method | Pros | Cons |
| Fresh (Logs, stumps, woodchips, straw) |
|
|
| Cold Ferment (Straw) |
|
|
| Hot pasteurization (straw) |
|
|
| Lime Straw) |
|
|
| Atmospheric steam (Sawdust, wood pellets, grain) |
|
|
| Pressurized steam (Sawdust, wood pellets, grain, agar) |
|
|
Inoculation
This step of the process involves bringing the spawn into contact with the substrate to initiate its growth and development. Depending on the substrate, inoculation may entail drilling holes into a log, cutting wedges into a stump, or mixing spawn into individual bags. Outdoor methods can generally be done with little concern for introducing contaminants (mostly molds), while most of the indoor methods require the substrate to be inoculated in a sterile space to avoid contaminating the substrate. There are three factors in this step to consider: 1) WHERE TO INOCULATE 2) INOCULATION RATES 3) SPAWN DISTRIBUTION

Where the process of inoculation happens depends on the nutrient level of the substrate. Low nitrogen, high carbon materials like logs, woodchips, and straw are fine to inoculate outside in the open air. During this form of inoculation it is helpful to be clean, using a clean table and clean hands but sterility is not a concern. Sterility becomes much more critical when using high nitrogen materials like agar, grain, and supplemented sawdust. These are easier for ambient microorganisms to grow on, so require the use of a lab-like setting for inoculations. On a small scale, it is possible to create low budget equipment to mimic a lab setting, but the success rate is lower. A commercial lab would include a separate space for lab use, cleaning and maintaining that space, using HEPA (high efficiency particulate air) filters, and equipment for steam treatment. If inoculations are done in a lab, being mindful of the seven vectors of contamination and implementing proper lab technique is critical.
Inoculation rates are a balance between economics and speed of spawn run. The cultivator is trying to get the desired edible mushroom mycelium established before anything else. The higher the inoculation rate or amount of spawn added to the substrate, the faster the mycelium will grow through the substrate. The substrate likely will not produce a larger amount of mushrooms, so a high inoculation rate means more money spent on spawn per pound of mushrooms. For a new cultivator, using a high inoculation rate can really boost the success rate. As the grower dials in the process of cultivation, they can start to lower the inoculation rate and observe if there is a difference in colonization time.
At Fungi Ally, this sort of trial was conducted on supplemented sawdust. Five pound bags of shiitake spawn were used to inoculate 20 five-pound bags of bulk substrate. These bags colonized in about 8 weeks. Slowly the amount of bags inoculated by the five pound bag of spawn was increased. At 30 five-pound bags of bulk substrate, colonization time was also 8 weeks and contamination rates did not go up. At -40 five-pounds bags, time until colonization was still 8 weeks, and little to no contamination increase was observed. At 50 five-pound bags both colonization time and contamination increased. The sweet spot was using one five-pound bag of spawn for every 200 pounds (40 bags) of substrate. The amount of money spent on spawn was decreased by 50% per pound of mushrooms. Saving .25 cents per pound of mushrooms adds up to a lot when growing 300 pounds per week - almost $4,000 per year!
Spawn distribution also impacts the speed of colonization. Two methods of distribution commonly used are “top spawning” and “through spawning”. Top-spawning is the process of adding the spawn on top of the substrate and letting it grow down. This process is good when inoculating full containers like mason jars that can not be shaken, or for low stakes cultivation. Through-spawning refers to shaking the substrate after inoculation to distribute the spawn throughout the substrate. This shortens the length of spawn run but adds a small amount of labor. In low tech methods like wood chip beds and straw tubes, through-spawning is achieved by layering the substrate and spawn like lasagna. Alternating between the spawn and substrate allows for faster colonization than putting all the spawn on top. In supplemented sawdust this typically means shaking the substrate after inoculation to distribute the spawn evenly.
The impact of top vs. through-spawning was inadvertently tested at Fungi Ally. One day, the crew was feeling like shaving some time off of the inoculation process. Instead of shaking after inoculating they left the spawn on top for 50% of the bags. Four shelves containing 40 bags each, were filled in the incubation room. The top two shelves were top-spawned, and the bottom two shelves were through-spawned. After 14 days the bottom two through-spawned shelves were fully colonized while the top spawned bags were closer to half colonized. By day 24, the top shelves were also fully colonized. In total it took ten extra days for the same amount of spawn to colonize a five pound bag of substrate. It saved a small amount of labor but was not worth the extra time in incubation. Not only did the top-spawned bags take up more space for a longer amount of time, but the extra time also left more opportunity for contaminants to take hold.
4. Incubation
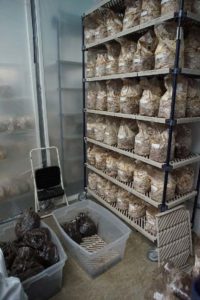
The rate at which spawn run happens will vary given the density of the substrate and species of mushroom. Oyster, for instance, is faster growing than shiitake. A sawdust-based substrate is much faster than logs. In general incubation time is as follows:

Shiitake logs: 6-18 months
Oyster logs: 4-12 months
Stumps: 24-36 months
Woodchips: 2-12 months (limit incubation time by flipping active bed into new chips)
Oyster on straw: 14-28 days
Oyster on sawdust: 10-20 days
Shiitake on sawdust: 42-84 days
Most specialties on sawdust: 21 days
During incubation, temperature and humidity control are the two primary factors to maintain. CO2 and lighting are not important during this phase. They can be adjusted for the comfort and utility of the humans that work in incubation.
Incubation for outdoor cultivation:
The most important factor during incubation is to ensure the mycelium doesn’t dry out. When growing on logs, if the ends begin to show cracking which is big enough to fit a dime into, it is time to soak. Soak the logs for 6-8 hours to get water deep into the log, this should not need to happen more than once per month during the summer months. For wood chip beds, watering right at inoculation and once a week for a month after should be adequate. As long as the bed is located in the shade and chips are 4 inches or deeper, they will maintain high moisture content.
Incubation for indoor cultivation:
During indoor cultivation, incubation can be an important factor in space utilization. By decreasing the amount of time spent in incubation, more bags can be produced in the same amount of space. Playing with variables like
temperature, inoculation rate, strain, and substrate can have big impacts on incubation time, allowing more mushrooms to be produced in the same amount of space. Compared to outdoor incubation, water content is not so much an issue as temperature. Since the substrate is contained in a plastic bag or something similar, water does not readily escape. During substrate preparation, the substrate should have received all the necessary water for spawn run. Temperature during incubation should not exceed 80 degrees F and is ideally around 70 degrees F. When using 5- or 10-pound bags of supplemented sawdust, the internal temperature of the bag can be 10-
15 degrees F warmer than the outside. If the exterior temperatures are 80 degrees F, the internal core could be 95 degrees F, which is getting warm enough for the mycelium to cook itself and introduce contamination. Exterior
temperatures can drop as far down as 50 degrees F, but incubation will take longer. Generally, in a well insulated room, cooling is more important than heating as the mycelium generates heat as it grows.
To ensure the bags do not overheat during incubation it is important to give them space on the shelving. A good general rule is to have a hand’s width of spacing between each bag. This allows adequate airflow to pass between
each bag. If the bags are touching those spots can easily overheat from the heat generated by the mycelial growth. This causes mycelial dieback and can introduce contaminants.

Shiitake incubation:
Shiitake on sawdust blocks are particularly finicky during incubation. They have two extra parts to colonization that most species do not. When full colonization is reached, shiitakes have another 4-5 weeks of incubation. After full colonization, popcorning begins, the block becomes textured and bumpy, and finally around week 5 the block starts to turn brown. Shiitakes should not be moved out of incubation until 75% of the block has turned brown and popcorned. If shiitake blocks are touching each other they will not popcorn and will not produce mushrooms in that spot. It is critical to give shiitake blocks a palm’s distance between each bag during incubation.
Shiitakes are much more sensitive to being induced into fruiting by physical shock or temperature swings. If incubating shiitakes, try to minimize temperature swings. If temperatures drop below 55 degrees F after week 4 or 5, the blocks tend to fruit instead of completing popcorning and browning, greatly reducing yields. Physical shock by moving the blocks or rearranging them will also induce early fruiting. Once shiitake are on the shelf, leave them alone for 6-7 weeks until most of the blocks have fully popcorned and turned brown, then move on to fruiting.
5. Initiation
Initiation is the link between mycelial growth and mushroom formation. This is the time when the substrate is fully colonized and maybe even showing signs of pinning. To initiate fruiting, lowering temperatures and increasing oxygen levels generally encourages mushroom formation. Initiation can be in the form of cold shocking, water shocking or introducing more oxygen by cutting a hole in the bag.
Shocking: Shiitake mushrooms respond very well to shocking. These methods of shocking are not typically used with any other species of mushroom. In log production, this is done by soaking the logs for 24 hours, inundating
them with water as if in a strong rainstorm. When using blocks, they typically only need to be soaked for 5-12 hours. Another method of shocking is cold shocking. Refrigerating shiitake blocks for 12-24 hours induces a strong pinset to form. Shiitake blocks are placed in a walk-in cooler for 12 hours and then the plastic bags are stripped off to initiate fruiting.
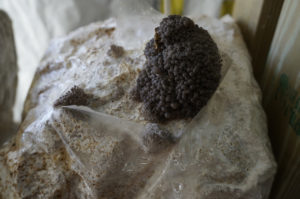
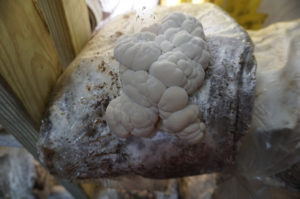
Cutting: With many other species like lions mane, chestnut, oyster, and king oyster the plastic bags are cut, exposing small areas to the oxygen rich environment, to encourage fruiting. Since the mycelium is all one organism, the energy is sent to the places where fruiting can optimally occur. When cutting the bags, it is good to have the plastic covering the substrate to maintain a high humidity. Different species are cut in different ways.
Oyster, chestnut, pioppino mushrooms:
Lion’s mane:
King oyster: King oyster requires higher humidity and sometimes scratching or casing for initiation. King bags are usually top fruited. The bags should be cut open at the top, leaving 3-inches of plastic above the substrate. This greatly increases humidity and allows mushroom to develop a long stem as desired.
6. Fruiting
The fruiting process is as much an art as it is a science. Direct observation of the mushrooms and substrate is needed throughout the fruiting process and for each crop. The mushrooms, in their morphology, color, texture, and abundance communicate what it is they need during the fruiting process. Just as there are many processes to grow mushrooms, there are countless ways to fruit mushrooms. Mushrooms can be fruited in a huge range of environments; from simple outdoor fruiting to indoor, highly controlled environments. Indoor fruiting rooms can range from a single shelf all the way up to a tractor trailer. Regardless of how one chooses to fruit mushrooms, there are four primary perimeters to consider:
Temperature: For most species, temperatures in the 60’s F are ideal. The highest quality mushrooms with good fruiting speed develop at temperatures in the low 60’s F. If a fruiting room was designed perfectly, keeping it around 62-65 degrees F would be ideal. This is a big part of the appeal to fruiting mushrooms in basements and other in-ground areas. By fruiting in a basement, temperatures can be kept in the range of 50-65 F with little to no supplemental heating/ cooling. As temperatures decrease, mushrooms tend to fruit slower but have a meatier texture. Once temperatures drop below 50-55 F many species greatly decrease their productivity. As temperatures increase, mushrooms become thinner and go past maturity quickly. As temperatures rise above 75 F, many species reduce their productivity and become a low quality mushroom. Some growers shift the species being grown based on seasonal temperatures. For example, if growing oyster, shifting from Pleurotus
ostreatus (blue or pearl oyster used in fall, winter, and spring) to Pleurotus pulmonarius (phoenix oyster used in summer) can help the business adapt to increasing temperatures in the grow room.

Humidity: Humidity is most critical during the first 4 days after initiation. During these tender days, baby mushroom pins are beginning to fruit. Humidity should be kept above 85%. As time goes on, the mushrooms become more resilient, and are able to withstand lower humidity levels. After about 3 days of pinning it is okay for humidity levels to drop as low as 60%, but ideal conditions mean keeping humidity in the 80% range. Humidity is usually maintained with some sort of commercial humidifier and a humidistat
or timer that shuts the equipment on and off.
Lighting: Lighting is the simplest part of creating environmental parameters for healthy mushroom fruiting. If a book can be read comfortably in the fruiting room space, your lighting should be sufficient. The old adage of “keep mushrooms in the dark and feed them shit” doesn’t apply with specialty mushrooms. Specialty mushrooms, unlike psilocybe and agaricus (button) need light for proper morphology. There isn’t a particular light spectrum that is needed as the mushrooms are not converting light into energy. It seems the mushrooms use light as a measurement of how far to extend their stems. Lowlight environments create skinny mushrooms with long stems, similar to plants that are grown in low-light environments. Regular shop lights in the room will work just fine, and LED strip lighting can be used for its energy efficiency.
Oxygen: Keeping the room fresh with oxygen is really what makes the whole art of fruiting mushrooms a dance. Mushrooms, like humans, breathe in oxygen and exhale CO2. When a room is filled with mushrooms and mycelium and sealed up, oxygen starts to run out. Fresh air needs to be brought in to keep CO2 levels below 1000 PPM for most species. Oysters are a little more picky and should be kept below 800 PPM. A general rule is to exchange all the air in the room every five-ten minutes. It is better to blast new air in, exchanging all the air in a minute or two, than have a low level fan on constantly. For example, if a grow room is 10x10x7 that is 700 cubic feet. A fan that is rated at 720 CFM (cubic feet per minute) will bring all new air into the room in one minute. This fan could be hooked to a timer and run for 60 seconds every 7 minutes or so for sufficient air exchange. Most growers install both an intake and exhaust fan and time them to run together. As you bring in fresh air, take consideration for its effect on the humidity and temperature level. For example, bringing in 100 F air into a chamber you want to keep at 65 - 70 F means your cooling system will have to work harder. When CO2 is
high, oyster and other mushrooms will form with long stems and little caps.

7. Harvest
Figure 18 The bounty of all this work! Time to harvest. It is critical to harvest at the right time. With most cap and stem mushrooms, this is as the gills are exposed but the cap margin is still curled under. This is optimal for quality and long term storage of the mushroom. The harvest window can be relatively short, especially in the summer or when temperatures rise above 75 degrees. Mushrooms need to be harvested every day to ensure the highest quality unless fruiting temperatures are below 60 degrees. If this is the case, harvesting some slightly premature mushrooms can allow one day to be skipped before needing to pick again. Mushrooms should be harvested into a container which allows breathing. Plastic with holes in it or cardboard boxes work great. It is very helpful if the containers are rigid to protect the fragile mushrooms inside.
Used bulb crates are a great option for harvesting mushrooms into. If possible, harvesting into the final packaging is a great way to save time and minimize handling of the mushrooms. Mushrooms can be very fragile post harvest, especially oysters.


By minimizing handling, these mushrooms can look way better than any grocery store mushroom. The broken margins on oysters in grocery stores are from excessive handling between the harvester and the consumer. If selling 5 lb cases to restaurants, harvest directly into the cases to sell the highest quality mushrooms. Once the mushrooms are harvested, cool them immediately. Harvested mushrooms should be stored at 34-37 degrees F and will last for about 7 days (if harvested at the right time) before needing to be sold. Shiitake tend to have a better shelf life than oyster or lions mane.

